
Software setup
All software for the course can be installed without having administrator privileges on your computer. We achieve this by using a package manager called Miniconda. Miniconda creates isolated environments where software packages and package dependencies can be installed from a small file listing the required packages.
Wifi instructions
UF users and Eduroam users should sign into the SSID “UF” or “Eduroam”.
USDA users should choose the SSID “UF Guest” and open their browsers to http://www.ufl.edu.
This will bring up the network sign-on screen. [Click here]((https://net-services.ufl.edu/provided-services/wireless/UF-guest-wireless.html)for more connection information.
Windows 10 instructions
(modified from Nicholas Dawson’s instructions)
Download
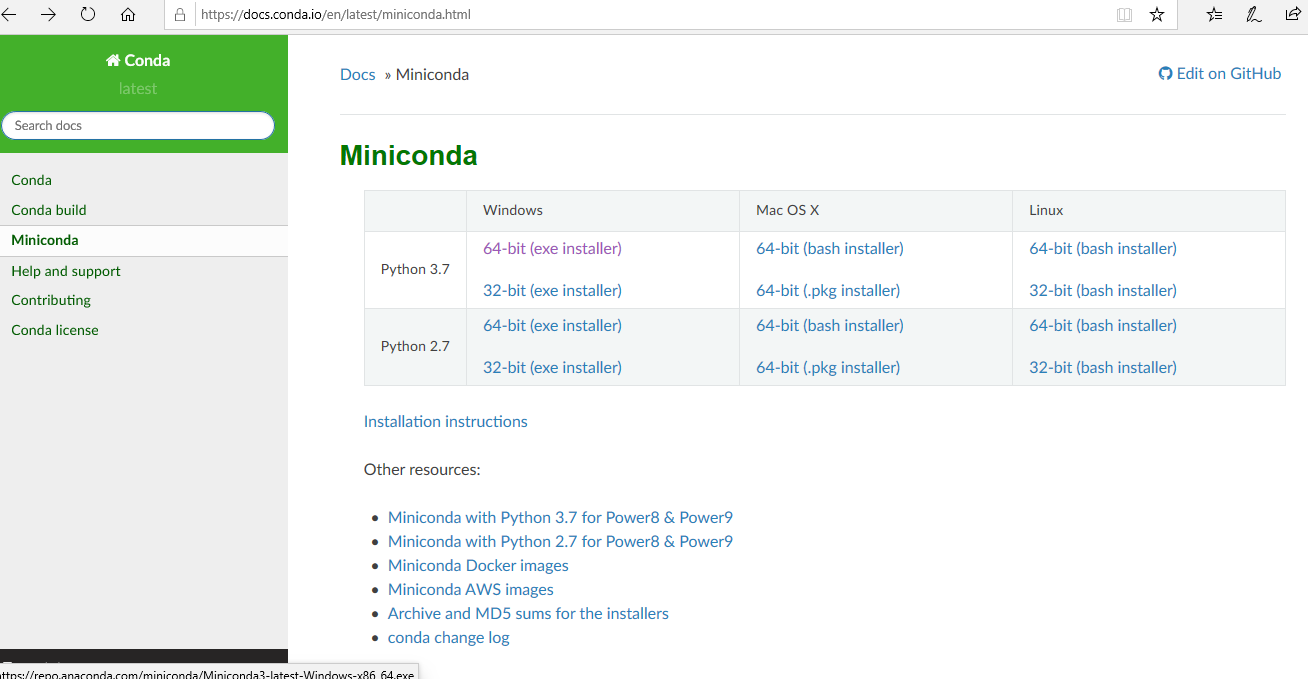
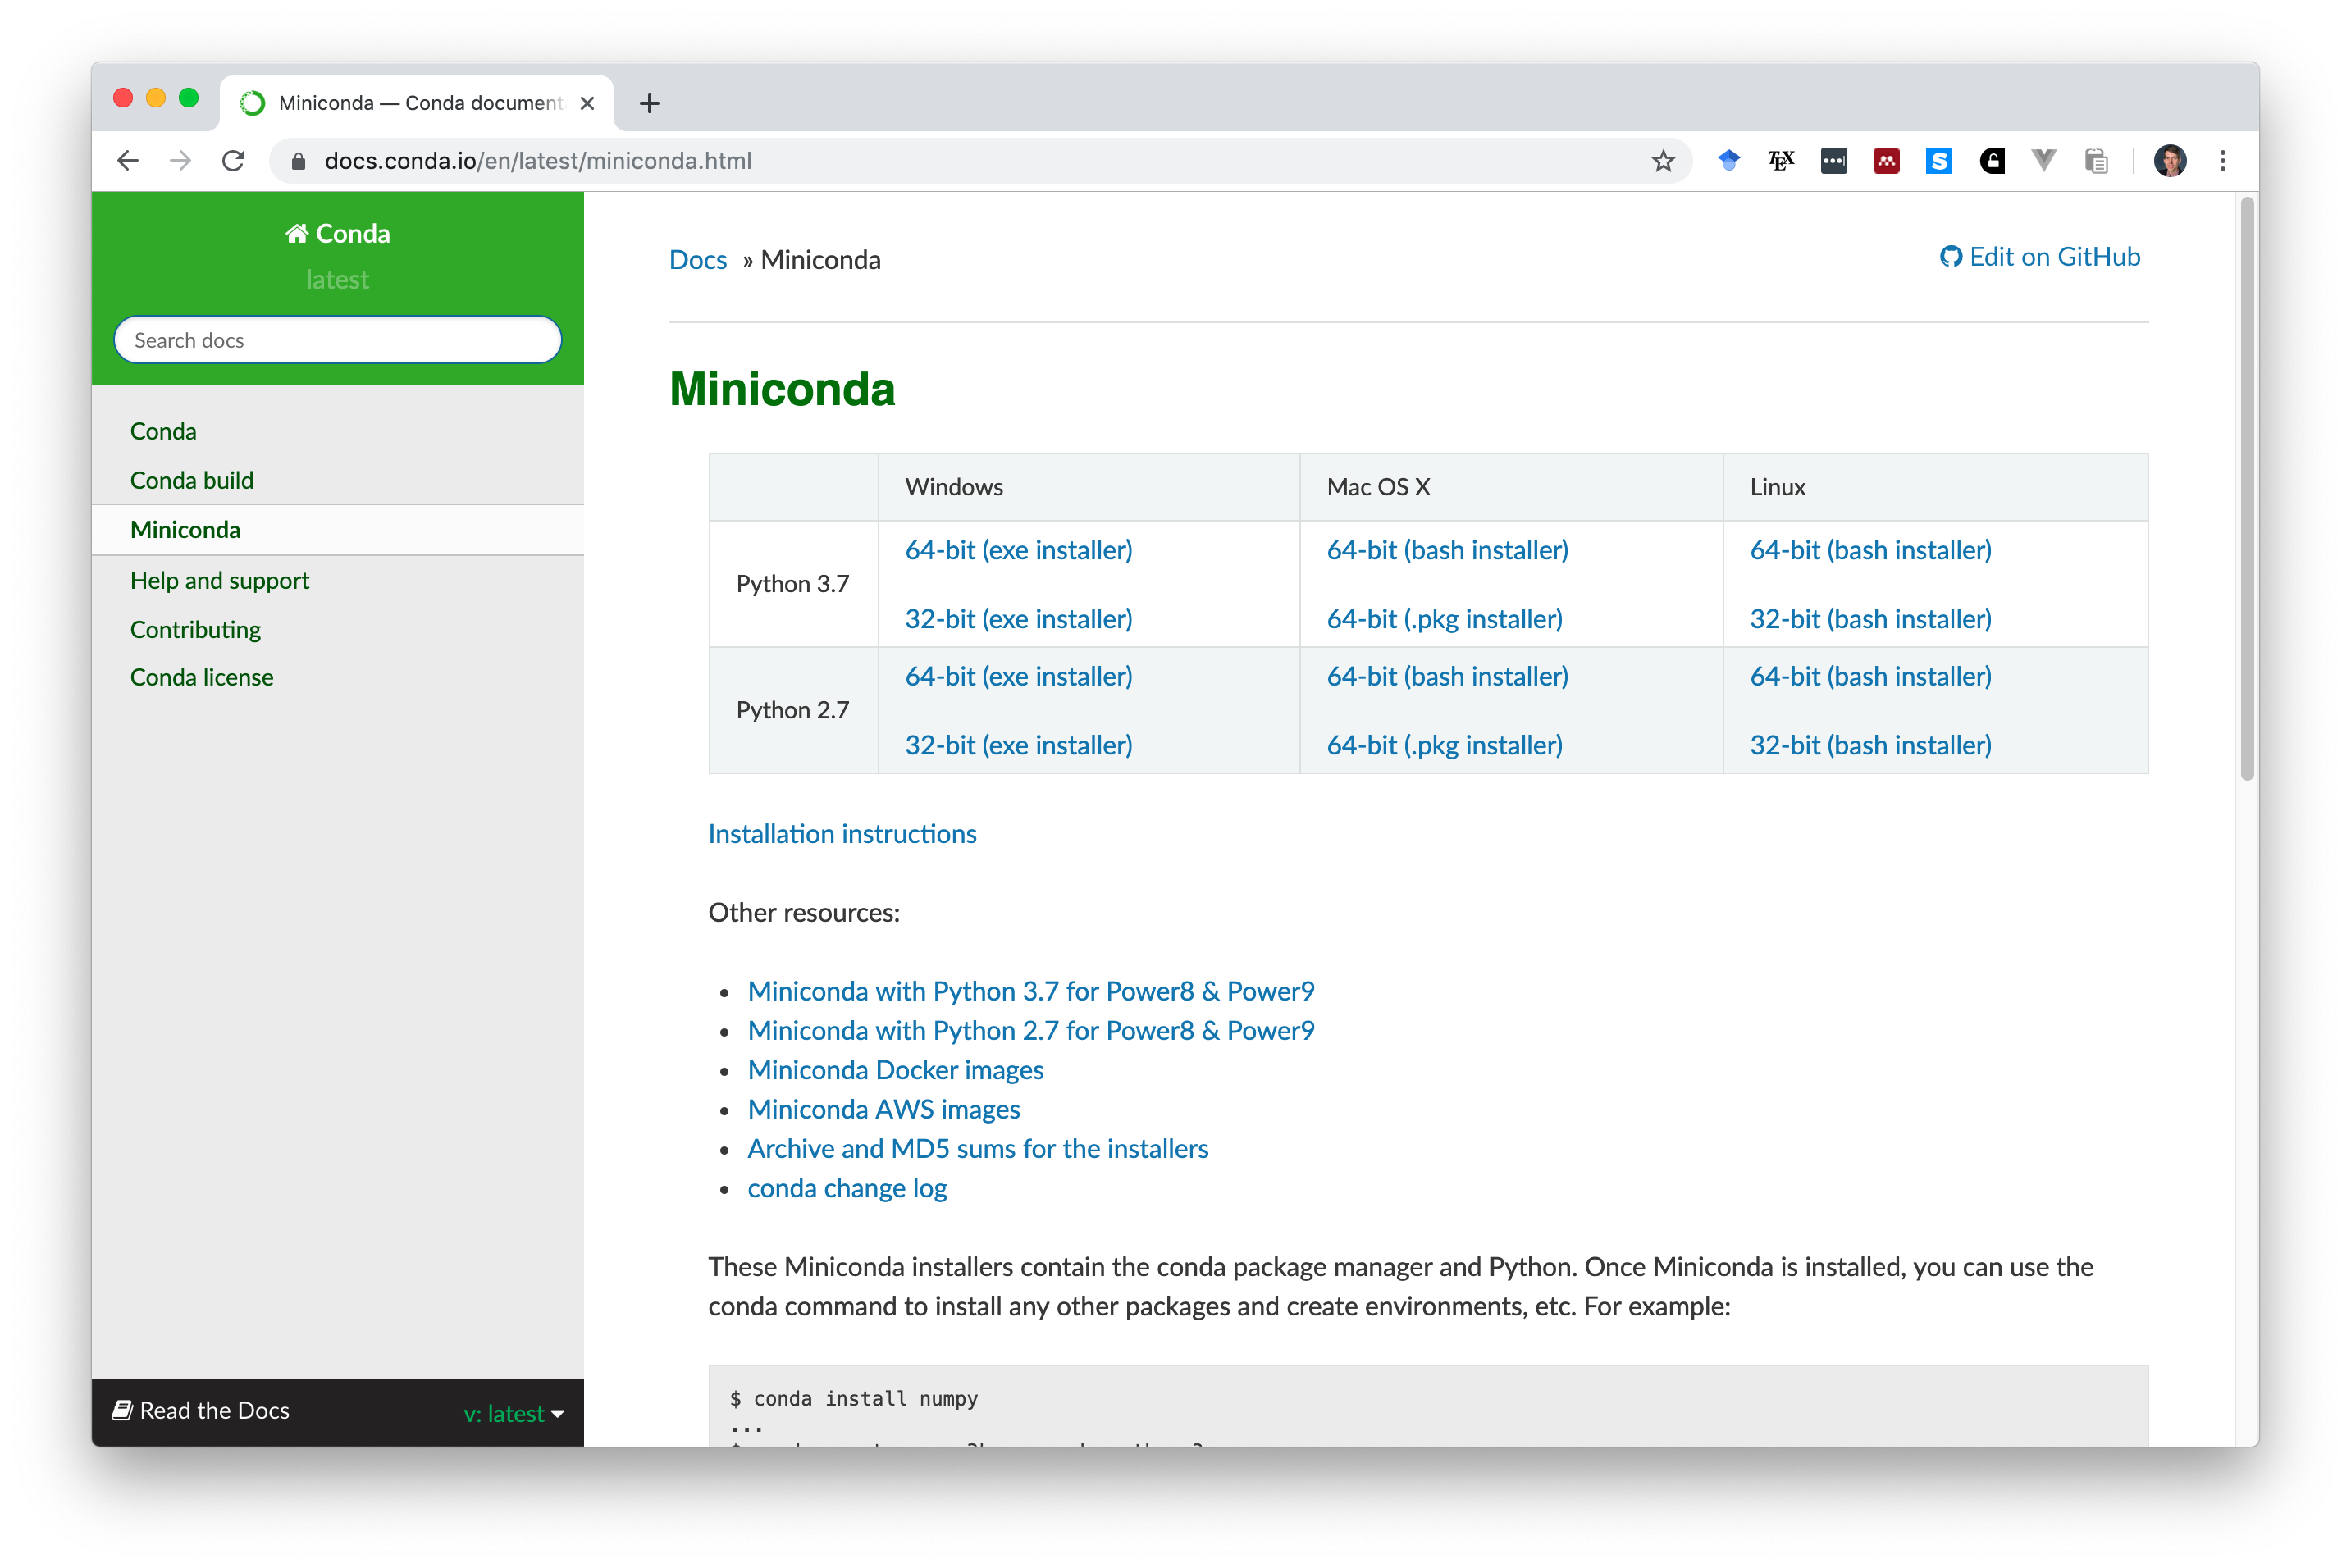
Go here to download the latest version of Miniconda. Download Miniconda for Python 3.7 (not2.7) Download either the 32-bit or 64-bit Windows version that corresponds to your computer’s architecture. If you don’t know which architecture you’re using, check this out. Most users will download the 64-bit version.
Install locally
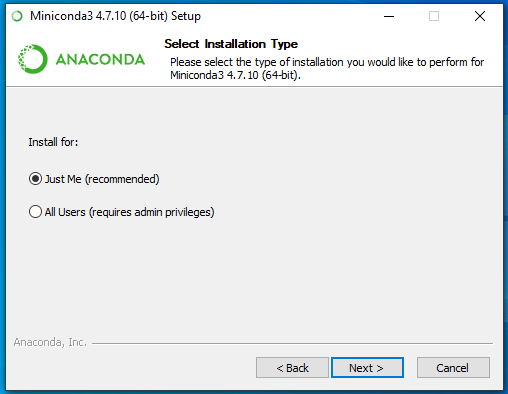
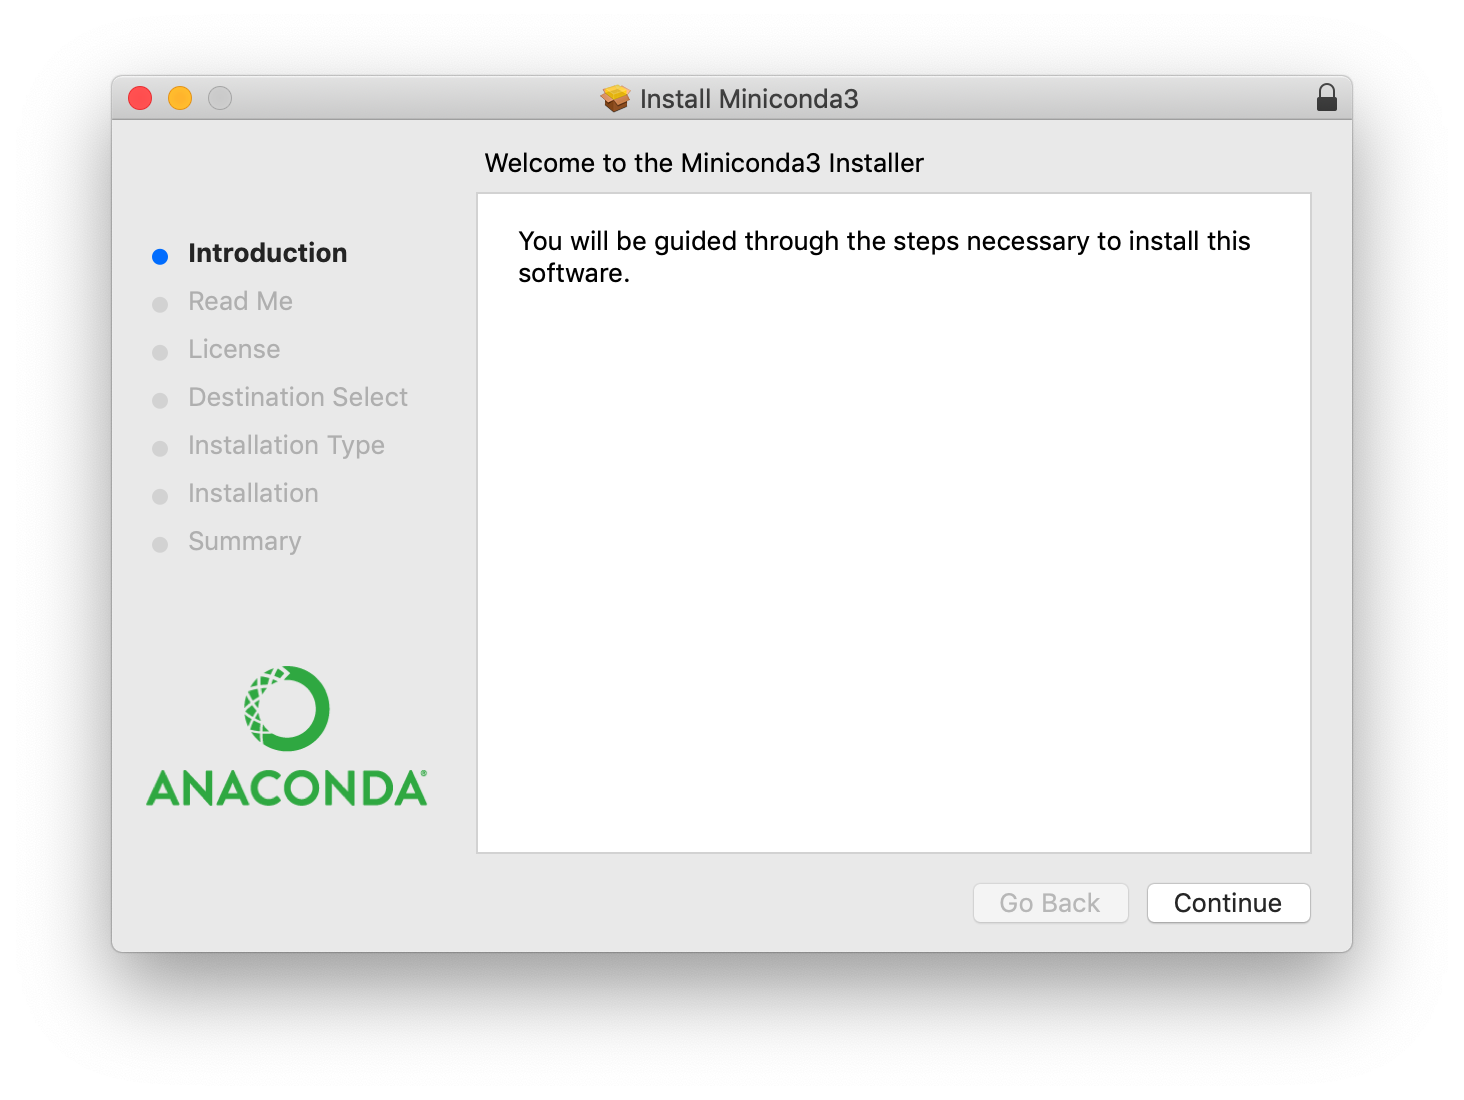
Open the downloaded Miniconda installer and select the installation type Just Me (recommended).
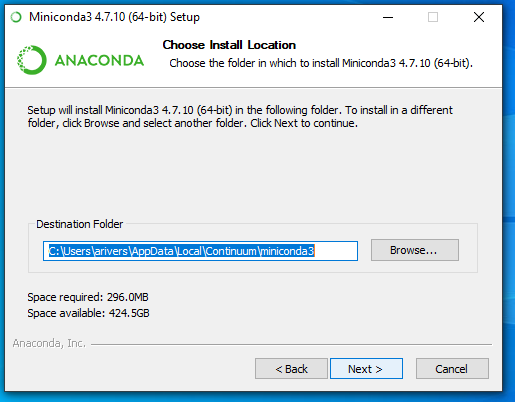
Choose the install location
Choose the default install location if it is available. That should be:
C:\Users\{username}\AppData\Local\Continuum\miniconda3
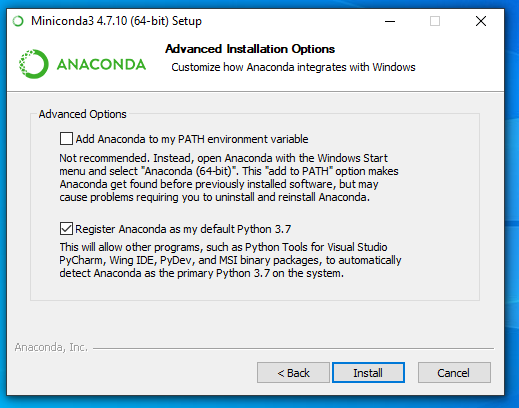
Choose advanced options
Select the default advanced options.
Post install
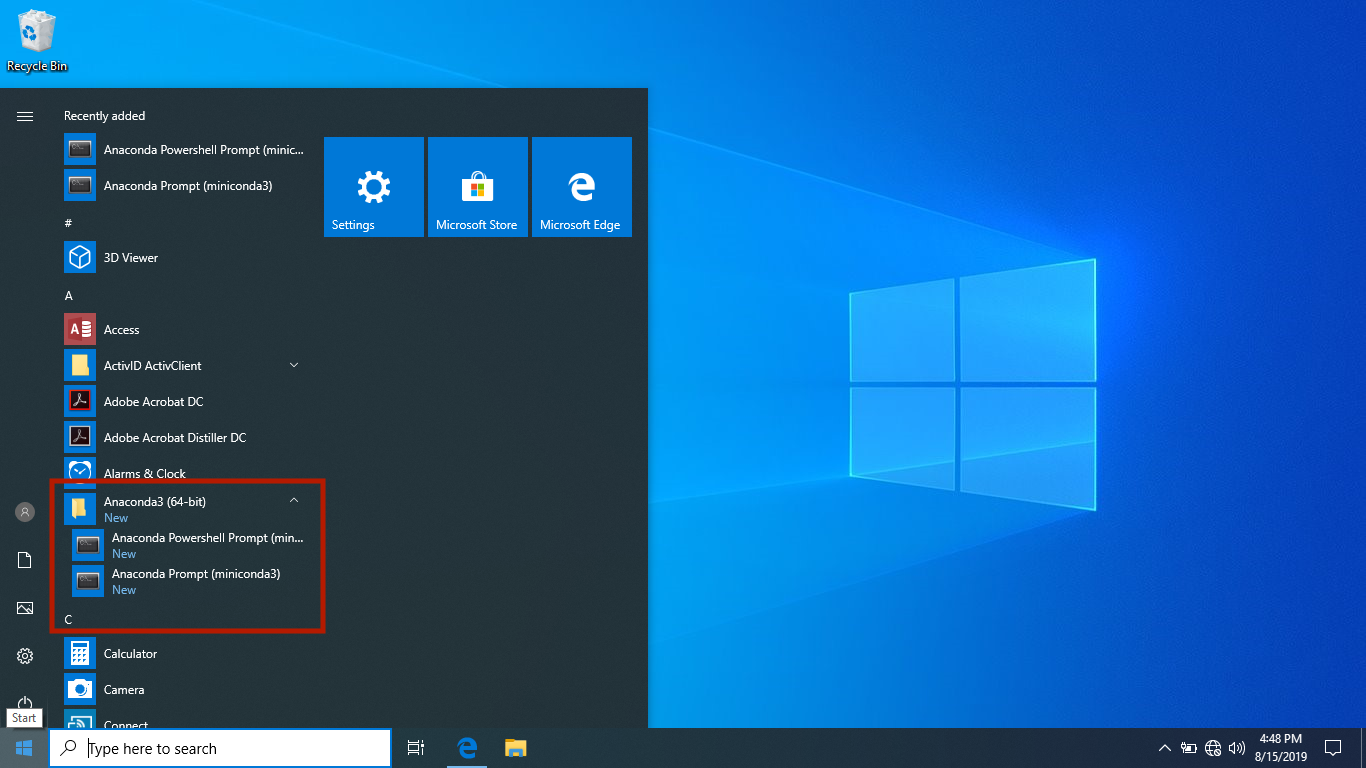
Your Miniconda shell should now be available under the start menu
Conda install
On Tuesday morning we will set up our conda environment as a class.
Download the this conda environment file windows64-mlenv.yaml.
The file specifies all the conda packages that need to be installed in an isolated
conda environment named mlenv.
From the Windows start menu select /Anaconda Powershell Prompt (miniconda3)
Move into the directory with the file and run:
conda env create -f windows64-mlenv.yaml
For more information refer to the conda docs
Once your conda environment has been created activate the environment:
conda activate mlenv
Download the course materials
On the first day of the course download the course materials so you can interactively code during the course.
Unzip the file then move into the top level of the directory in your Anaconda
Powershell with the environment mlenv active.
Start your Jupyter notebooks
Start up your Jupyter notebook with this command:
jupyter notebook
This should open in your browser
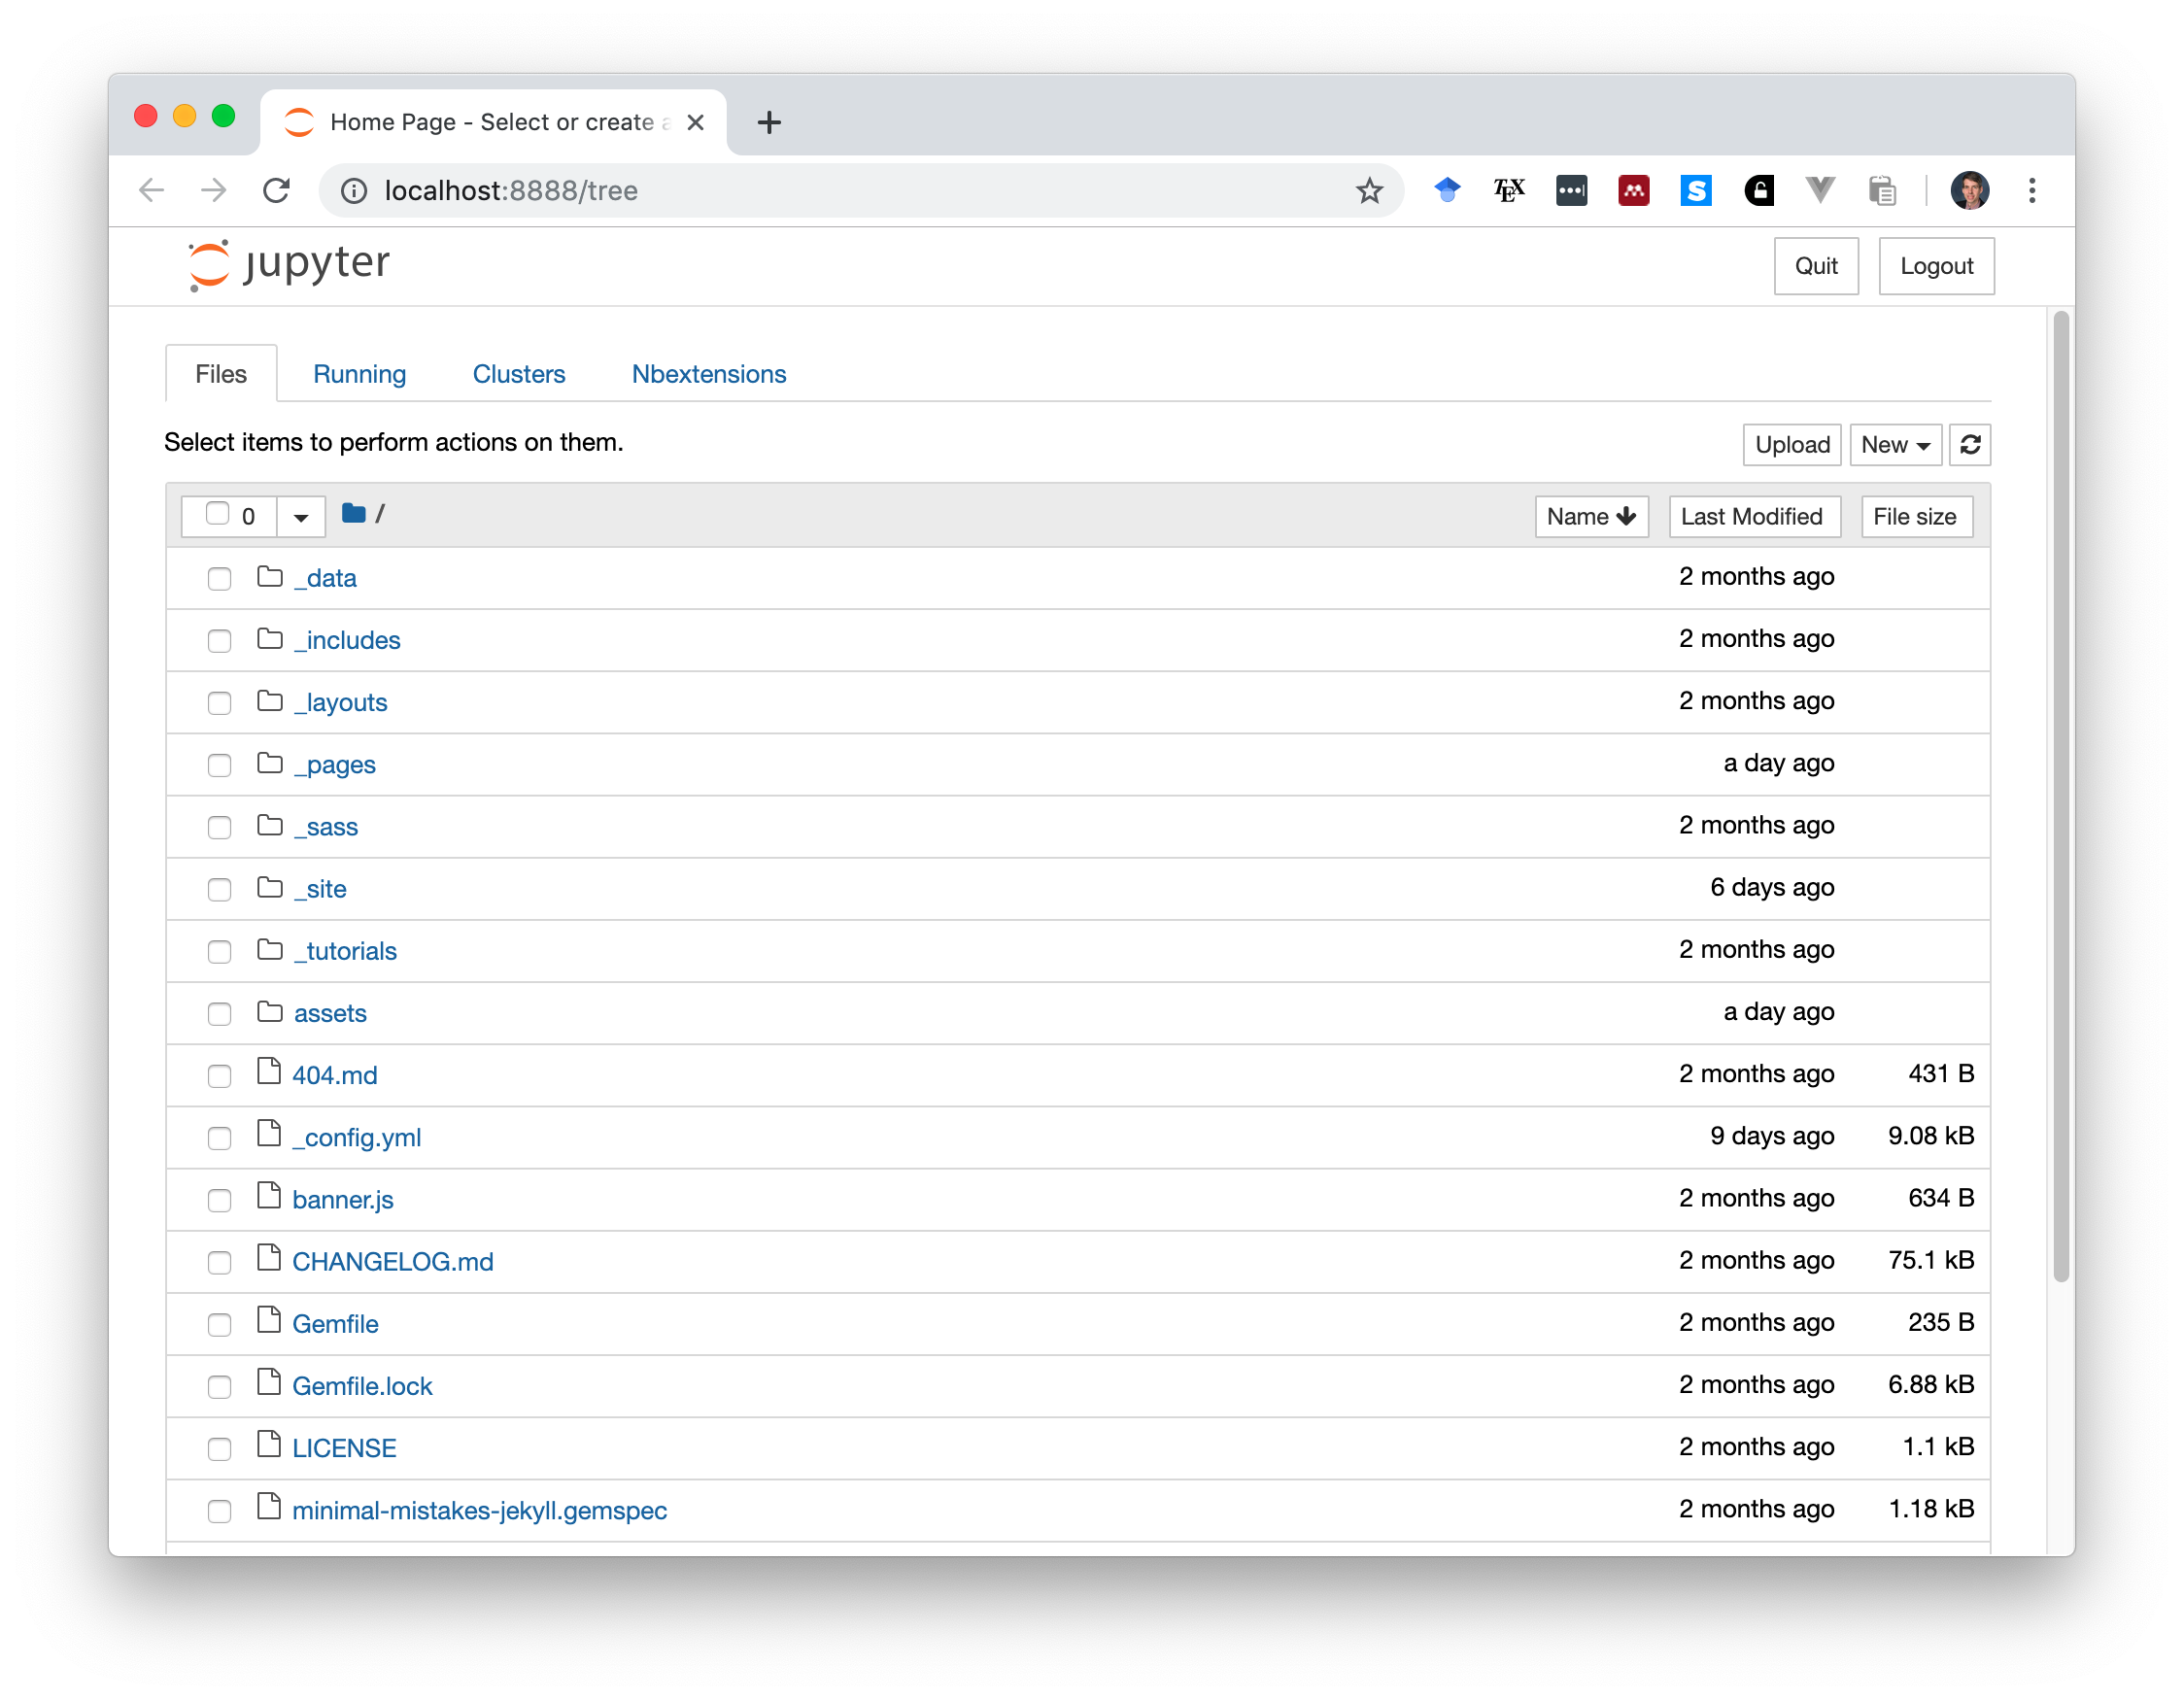
From the web page select assets > nb-lessons > 01_Python_for_ML_warm_up.ipynb
MacOS 10.14 instructions
Download
Go here to download the
latest version of Miniconda. Download for Python 3.7
(not 2.7). Download the Mac OS X 64-bit (.pkg installer)
Install locally
Open the downloaded Anaconda installer and install in the default location
Post install
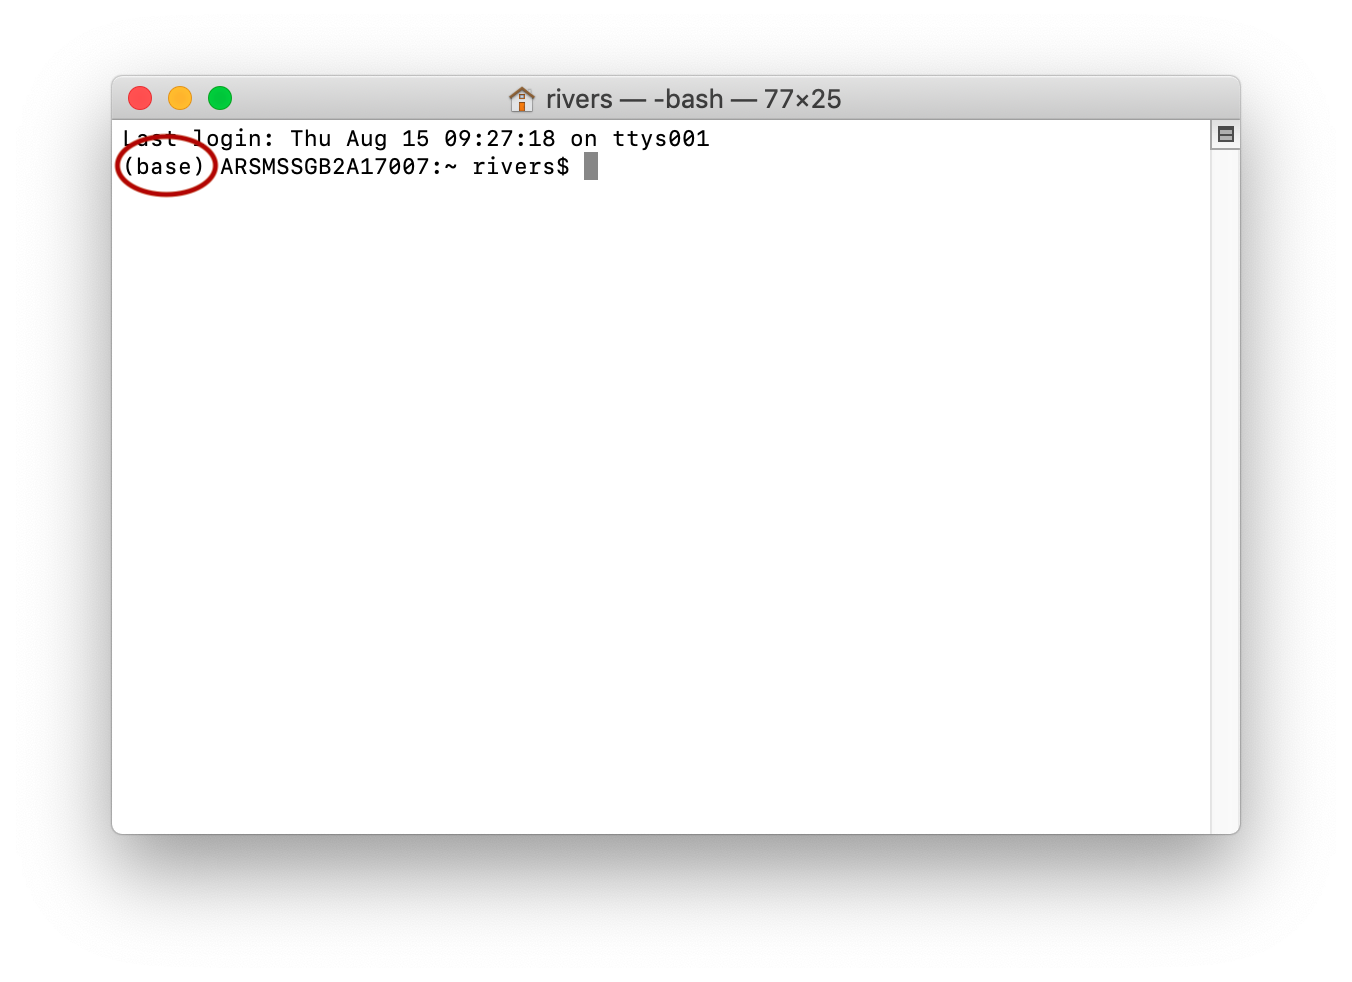
You can now open up your mac’s Terminal program under Applications -> Utilities -> Terminal.app. If you see (base)at the beginning of your Terminal prompt then conda was installed successfully.
On Tuesday morning we will set up our conda environment as a class
Set up your conda environment
Download the this conda environment file mlenv.yaml.
The file specifies all the conda packages that need to be installed in an isolated
conda environment names mlenv. Open the Terminal.app and run this conda
command in the directory with the file:
conda env create -f mlenv.yaml
For more information refer to the conda docs
Once your conda environment has been created activate the environment using
conda activate mlenv
Download the course materials
On the first day of the course download the course materials so you can interactively code during the course.
Unzip the file then move into the directory.
Start your Jupyter notebook
Start up your Jupyter notebook with this command:
jupyter notebook
This should open in your browser
From the web page select assets > nb-lessons > 01_Python_for_ML_warm_up.ipynb
This will bring up our first notebook lesson. Go to the menu
Kernel > Change kernel and select the kernel for our conda environment mlenv.
Linux instructions
Download
Go here to download the
latest version of Miniconda. Download for Python 3.7. Download either the
32-bit or 64-bit Linux version that corresponds to your computer’s
architecture. If you don’t know which architecture you’re using type arch
into the terminal. Download the Linux 64-bit (bash installer) or the Linux 64-bit (bash installer).
Install locally
Open the terminal and move into the directory where Miniconda was downloaded and run the Bash script to install Miniconda
bash Miniconda3-latest-Linux-x86_64.sh
Post install
Close and reopen your Terminal. If you see (base)at the beginning of your Terminal prompt then conda was installed successfully.
Set up your conda environment
On Tuesday morning we will set up our conda environment as a class.
conda create -n mlenv python=3.7 pandas numpy seaborn jupyter
conda activate mlenv
conda install -c https://conda.anaconda.org/biocore scikit-bio
conda install -c conda-forge scikit-learn
For more information refer to the conda docs
Once your conda environment has been created activate the environment using
conda activate mlenv
Download the course materials
On the first day of the course download the course materials so you can interactively code during the course.
Unzip the file then move into the directory.
Start your Jupyter notebook
Start up your Jupyter notebook with this command:
jupyter notebook
This should open in your browser
From the web page select assets > nb-lessons > 01_Python_for_ML_warm_up.ipynb
This will bring up our first notebook lesson. Go to the menu
Kernel > Change kernel and select the kernel for our conda environment mlenv.
About Jupyter notebooks
We will be doing all of our coding in Jupyter notebooks so it’s useful to understand what these documents are. Jupyter notebooks are a mixture of text, code blocks and the output of those code blocks. When you first open up a notebook it usually has output graphs already generated. These outputs are just the saved from the last time the notebook was used. Behind the scenes you are opening up a blank new python terminal. No variables, functions or modules exist yet.
As you run code blocks the variables will be created and output will be replaced. Because of this the order you run these block in matters. If you run the last block first the variables it needs may not be available. Similarly, if you go back and run the same block again you can potentially overwrite variables. If you are getting unexpected results a common solution is to restart and run the code block sequentially. Remember that as you work and change values your notebook changes.